In this digital age, a reliable internet connection is essential for both work and leisure. Tenda routers have gained popularity for their affordability and performance. To make the most of your Tenda router, you need to know how to access its settings through Tenda router login. In this guide, we will walk you through the process step by step.
Prerequisites for Tenda Router Login
Before you begin, make sure you have the following:
- A Tenda Router: Of course, you’ll need a Tenda router installed and powered on.
- A Device with Internet Access: You can use a computer, laptop, smartphone, or tablet to access the router settings. Ensure that it’s connected to the router’s Wi-Fi network or plugged in via Ethernet cable.
Step-by-Step Guide for Tenda Router Login
Follow these steps to log in to your Tenda router:
Step 1: Connect to the Router
Ensure your device is connected to the Tenda router’s network. You can connect via Wi-Fi or Ethernet cable.
Step 2: Open a Web Browser
Open your preferred web browser. It could be Chrome, Firefox, Safari, or Edge.
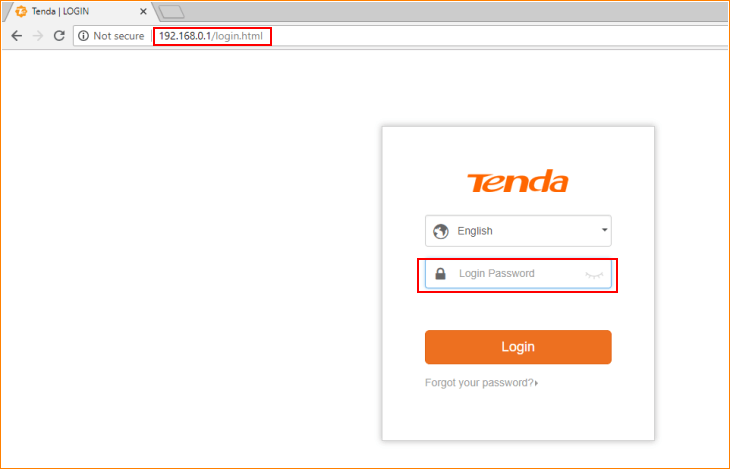
Step 3: Enter the Router’s IP Address
In the address bar of your browser, type the default IP address for Tenda routers, which is usually one of the following:
Press Enter. You should now see the router’s login page.
Step 4: Enter Login Credentials
On the login page, you will be prompted to enter your username and password. By default, these are often set to:
- Username: admin
- Password: admin
However, it’s crucial to change these defaults for security reasons. If you’ve already set custom credentials, enter those.
Step 5: Access Router Settings
Once you’ve entered the correct login credentials, click the “Login” or “Submit” button. You should now have access to your Tenda router’s settings.
What to Do After Logging In?
After successfully logging in, you can explore various options and settings within the router interface. Here are some common tasks you might want to perform:
- Change Wi-Fi Settings: You can update your Wi-Fi network name (SSID) and password to something more secure and memorable.
- Set up Guest Networks: If you have guests frequently, consider setting up a separate guest network with limited access to your main network.
- Update Firmware: It’s essential to keep your router’s firmware up to date for security and performance improvements. Check for firmware updates in the settings.
- Security Settings: Review and enhance your router’s security settings, including firewall settings and device access control.
- Port Forwarding: If you have specific applications or devices that require open ports, configure port forwarding as needed.
- Quality of Service (QoS): Prioritize certain devices or services to ensure they get the best possible bandwidth.
- Parental Controls: If you have children, you can use parental control features to restrict access to certain websites and content.
Why Access Tenda Router Settings?
Accessing your Tenda router’s settings allows you to:
- Secure Your Network: You can change the default login credentials and set up a strong password to protect your network from unauthorized access.
- Improve Performance: Adjust settings such as Wi-Fi channels and bandwidth allocation to optimize your network’s performance.
- Troubleshoot Issues: If you encounter connectivity problems, accessing the router settings can help you diagnose and fix issues.
Conclusion
Accessing your Tenda router settings through Tenda router login is a fundamental skill for any router owner. It empowers you to take control of your network’s security, performance, and functionality. By following the steps outlined in this guide, you can ensure that your Tenda router is configured to meet your specific needs. Remember to regularly review and update your settings to keep your network in top shape.